
Pests don’t knock before entering. They slip through gaps in foundation walls, crawl beneath door sweeps, and squeeze through cracks barely visible to the naked eye. A single mouse needs only a ¼-inch opening, roughly the diameter of a dime, to invade your home. Rats require just ½ inch. Once inside, these unwelcome guests reproduce quickly, contaminate food sources, chew through wiring, and create health hazards. Home sealing, also called exclusion, addresses the root cause by physically blocking entry points before pests find them. This guide walks through professional sealing services, DIY methods, materials, and realistic cost expectations to help homeowners take control.
Table of Contents
ToggleKey Takeaways
- Home sealing service prevents pest infestations by closing structural gaps and entry points, eliminating the conditions that attract mice, rats, and other pests permanently rather than relying on repeated chemical treatments.
- Common pest entry points include foundation cracks wider than 1/16 inch, damaged weatherstripping, gaps around utilities, uncapped chimneys, and vents without proper screening—regular inspection with a flashlight can identify hidden vulnerabilities.
- DIY home sealing is practical for ground-level gaps and utility penetrations using polyurethane foam, silicone caulk, and ¼-inch hardware cloth, but professional services are essential for roof work, structural concerns, and properties with active wildlife infestations.
- Quality materials like pestblock-rated foam, copper mesh, and commercial-grade sealants resist UV damage and rodent chewing far better than budget alternatives, justifying the investment in durability.
- Professional home sealing services cost $300–$1,500 for standard jobs, while DIY projects run $100–$300 in materials, making prevention significantly cheaper than treating an active infestation that can cost $300–$600 or more.
- A reputable home sealing contractor provides detailed inspections using thermal imaging, maps all entry points, offers liability insurance and warranties, and includes comprehensive repairs like mesh installation and soffit replacement.
What Is Home Sealing and Why Does It Matter for Pest Prevention?
Home sealing, often referred to as pest exclusion, is the process of identifying and closing off structural gaps, cracks, and openings that pests exploit to enter a building. Unlike chemical treatments that kill pests after they’ve already invaded, exclusion in pest control prevents entry entirely by creating physical barriers.
This approach targets common infiltrators: mice, rats, cockroaches, ants, spiders, and even larger animals like squirrels or raccoons. It’s the most effective long-term strategy because it eliminates the conditions that allow infestations to start. Chemical treatments lose effectiveness over time and require repeat applications. Sealing is a one-time investment that pays dividends for years.
Why it works: Pests follow scent trails, temperature gradients, and moisture. They’re opportunistic, not malicious. A poorly sealed home offers food, water, warmth, and shelter. By removing access, homeowners force pests to search elsewhere. For DIYers, this is empowering, sealing is largely a mechanical fix, not a chemistry experiment.
Common Entry Points Pests Use to Invade Your Home
Identifying vulnerabilities is half the battle. Walk your home’s perimeter and interior with a critical eye, focusing on these high-risk zones:
Foundation and siding:
- Cracks wider than 1/16 inch in poured concrete or block foundations
- Gaps where siding meets the foundation or corners
- Weep holes in brick veneer (necessary for drainage but can be screened)
- Spaces around basement window frames
Roof and attic:
- Gaps along the roofline where fascia boards meet soffits
- Uncapped or damaged chimney crowns
- Roof vents without proper screening (gable vents, ridge vents)
- Gaps around plumbing stacks or exhaust vents penetrating the roof deck
Doors and windows:
- Worn weatherstripping on entry doors
- Gaps beneath garage doors (especially roll-up styles)
- Missing or damaged window screens
- Spaces around window AC units or through-wall sleeves
Utilities and penetrations:
- Openings where electrical conduit, gas lines, or cable/phone lines enter the home
- Dryer vent terminations without dampers
- Crawlspace vents with torn or missing screens
- HVAC line sets penetrating exterior walls
Mice can flatten their bodies to slip through a gap the width of a pencil. Inspect at ground level and use a flashlight, daylight visible from inside a basement or crawlspace means pests can enter.
Professional Home Sealing Services vs. DIY Sealing
Homeowners capable of basic carpentry and caulking can handle the majority of sealing work. The question isn’t whether DIY is possible, it is, but whether it’s practical given time, access, and scope.
When to DIY:
- Ground-level gaps, door sweeps, and window weatherstripping are straightforward weekend projects.
- Foundation cracks accessible from grade or a basement can be filled with hydraulic cement or polyurethane foam.
- Utility penetrations around pipes and wires are manageable with expanding foam and metal mesh.
When to call a pro:
- Height and safety risks. Sealing second-story soffits, gable vents, or chimney gaps requires ladders, scaffolding, or roof access. Falls are the leading cause of DIY injuries.
- Structural concerns. Large foundation cracks (wider than ¼ inch and growing) may indicate settling or water intrusion, issues that require a structural engineer or foundation specialist, not just sealant.
- Wildlife already present. If pests have moved in, exclusion must be paired with humane removal. Sealing an occupied entry traps animals inside, leading to death, odor, and secondary infestations. Licensed pest control operators know how to install one-way doors and confirm exits before sealing.
- Comprehensive inspections. Professionals use thermal imaging cameras and borescopes to find hidden gaps in wall cavities or behind siding that aren’t visible during a walk-through.
What to Expect from a Professional Home Sealing Service
A reputable exclusion service begins with a detailed inspection, expect 1-2 hours for a typical single-family home. The technician maps entry points, notes conducive conditions (standing water, overgrown vegetation, improperly stored firewood), and prioritizes repairs.
Sealing work typically includes:
- Installing copper or stainless steel mesh in weep holes and vent openings (rodents can’t chew through metal)
- Applying commercial-grade polyurethane or silicone caulk along foundation joints and around penetrations
- Replacing damaged door sweeps and threshold seals
- Screening gable vents, crawlspace vents, and roof vents with ¼-inch hardware cloth
- Repairing damaged soffits and fascia boards
Pros carry liability insurance and offer warranties, often 1 year against re-entry via sealed points. That peace of mind has value, especially for two-story homes or properties with complex rooflines.
Essential Materials and Tools for Effective Home Sealing
Quality materials outlast cheap alternatives and resist UV degradation, temperature swings, and pest gnawing. Stock up on the following:
Sealants and fillers:
- Polyurethane foam sealant (Great Stuff Pro or equivalent): Expands to fill irregular gaps around pipes and wires. Avoid standard foam, it’s too soft and rodents chew through it. Look for “pestblock” formulations containing bitter additives.
- Silicone or polyurethane caulk: For joints, foundation cracks, and window frames. Choose paintable exterior-grade products rated for movement (at least 25% elasticity).
- Hydraulic cement: For active foundation cracks or holes in masonry. Sets quickly even in damp conditions.
Screening and mesh:
- ¼-inch galvanized hardware cloth: The gold standard for vent screening. Rodents can’t chew through it. Cut with aviation snips and secure with staples or screws and fender washers.
- Copper mesh (Stuf-Fit or similar): Stuffed into gaps before caulking. Deters gnawing and won’t rust.
Weatherstripping and door seals:
- Adhesive-backed EPDM rubber weatherstrip: For door jambs and window sashes. Replace every 3-5 years.
- Door sweeps: Choose brush-style for uneven thresholds, vinyl or rubber blade-style for smooth concrete or wood.
Tools:
- Caulk gun (ratcheting or smooth-rod)
- Utility knife and spare blades
- Wire brush for cleaning surfaces pre-caulk
- Flashlight or headlamp
- Tape measure
- Putty knife or scraper
- Drill/driver with masonry bits (for hardware cloth installation)
Safety gear:
- Work gloves
- Safety glasses
- Dust mask (N95 if working in crawlspaces or attics with rodent droppings, hantavirus is a real risk)
Buy more caulk than you think you need. A standard 10-oz tube covers roughly 30 linear feet at a ⅜-inch bead, but real-world gaps eat product faster.
Step-by-Step Guide to Sealing Your Home Against Pests
Work methodically, starting from the outside perimeter and moving to interior spaces.
1. Inspect and document entry points
Walk the foundation, noting cracks, gaps, and penetrations. Check soffits, vents, and roofline from ground level with binoculars if needed. Photograph problem areas for reference.
2. Clean and prep surfaces
Remove loose mortar, dirt, old caulk, and cobwebs with a wire brush. Sealants won’t adhere to dirty or oily surfaces. Let damp areas dry fully before applying caulk.
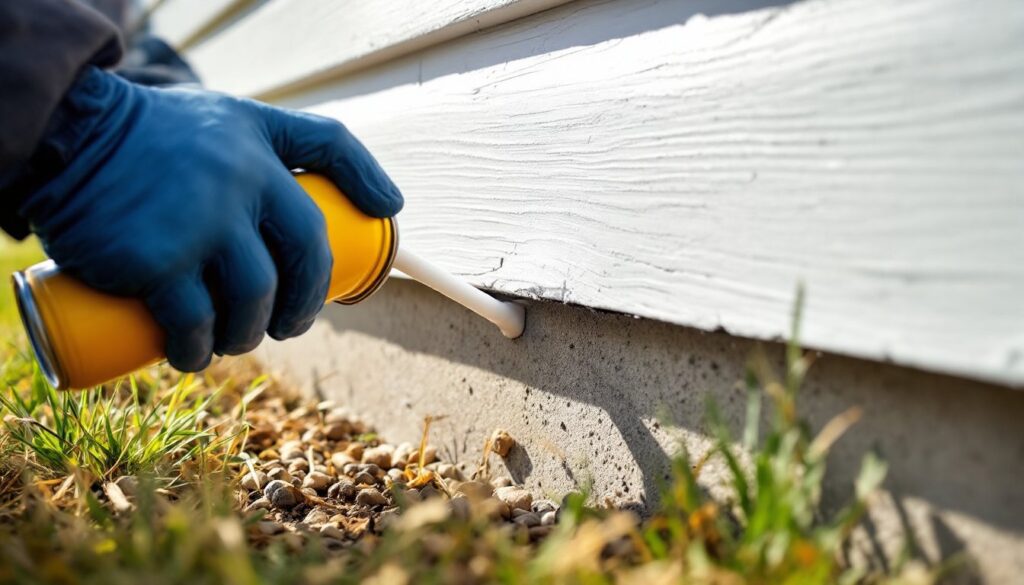
3. Seal foundation cracks and gaps
- For cracks up to ½ inch wide, apply polyurethane caulk directly from the tube, smoothing with a wet finger or putty knife.
- For larger cracks or active leaks, mix hydraulic cement per label directions and trowel into place. It sets in 3-5 minutes, so work fast.
- Stuff oversized gaps (around pipes, conduit) with copper mesh, then cap with foam sealant or caulk. This two-layer approach stops rodents cold.
4. Screen vents and openings
Cut ¼-inch hardware cloth to size, allowing 1-inch overlap on all sides. Secure with stainless screws and fender washers, or staple if attaching to wood framing. Don’t block airflow, vents exist for a reason (crawlspace ventilation, attic airflow). Screening allows function while excluding pests.
5. Install or replace door sweeps and weatherstripping
Measure door width precisely. Most sweeps are cut-to-fit aluminum or vinyl channels. Install so the sweep just brushes the threshold, too tight and the door binds: too loose and gaps remain. For weatherstripping, clean jambs with rubbing alcohol, peel backing, and press firmly into place.
6. Seal utility penetrations
Where pipes, wires, or HVAC lines enter the home, foam sealant fills irregular voids. Apply in layers if the gap exceeds 1 inch (foam expands and can distort if applied too thickly at once). Trim excess after it cures (usually 1 hour).
7. Address roof and attic gaps
If comfortable working from a ladder, apply caulk along fascia joints and around roof penetrations. For gable vents, remove the existing louver, cut hardware cloth to fit, and reinstall the louver over the screen. Hire a roofer if you’re not confident with ladder work, especially on steep pitches.
8. Inspect attics and crawlspaces from the inside
Look for daylight penetrating through wall plates, around chimney chases, or along rim joists. Seal from the accessible side with foam or caulk.
9. Trim vegetation and eliminate conducive conditions
Branches touching the roofline become pest highways. Cut tree limbs back at least 6 feet from the house. Move firewood stacks at least 20 feet from the foundation and store on racks, not the ground.
How Much Does Home Sealing for Pest Control Cost?
DIY sealing runs $100-$300 for materials on a typical single-family home, depending on the number and size of gaps. That assumes the homeowner already owns basic tools.
Material costs (approximate):
- Caulk and foam sealant: $30-$60 (6-10 tubes)
- Hardware cloth (25-ft roll): $25-$40
- Copper mesh: $15-$25
- Door sweeps and weatherstripping: $20-$50
- Hydraulic cement: $10-$15 per tub
Professional home sealing services vary widely by region and scope. According to data on HomeAdvisor, exclusion work ranges from $300 to $1,500 for standard jobs. Larger homes, multi-story properties, or those requiring wildlife removal and extensive repairs can run $2,000-$3,500.
Factors affecting cost:
- Home size and complexity: Ranch-style homes with accessible crawlspaces cost less than multi-story Victorians with complex rooflines.
- Extent of damage: Replacing rotted soffits or fascia boards adds carpentry labor.
- Wildlife involvement: If animals are present, expect trapping/removal fees ($200-$500) plus exclusion work.
- Region: Labor rates in urban markets (San Francisco, New York) exceed rural areas by 30-50%.
Get at least two quotes and ask for itemized estimates. Reputable companies include photos of entry points and detailed repair descriptions. Be wary of lowball bids, skimping on materials (using standard foam instead of pestblock, skipping metal mesh) undermines effectiveness.
For design inspiration or contractor directories to find qualified professionals, platforms like Houzz offer searchable databases of local pest control and home improvement specialists.
Sealing pays for itself quickly. A single mouse infestation remediation costs $300-$600, and that’s without factoring in damaged insulation, chewed wiring, or contaminated food. Prevention is cheaper than remediation, and far less stressful.